


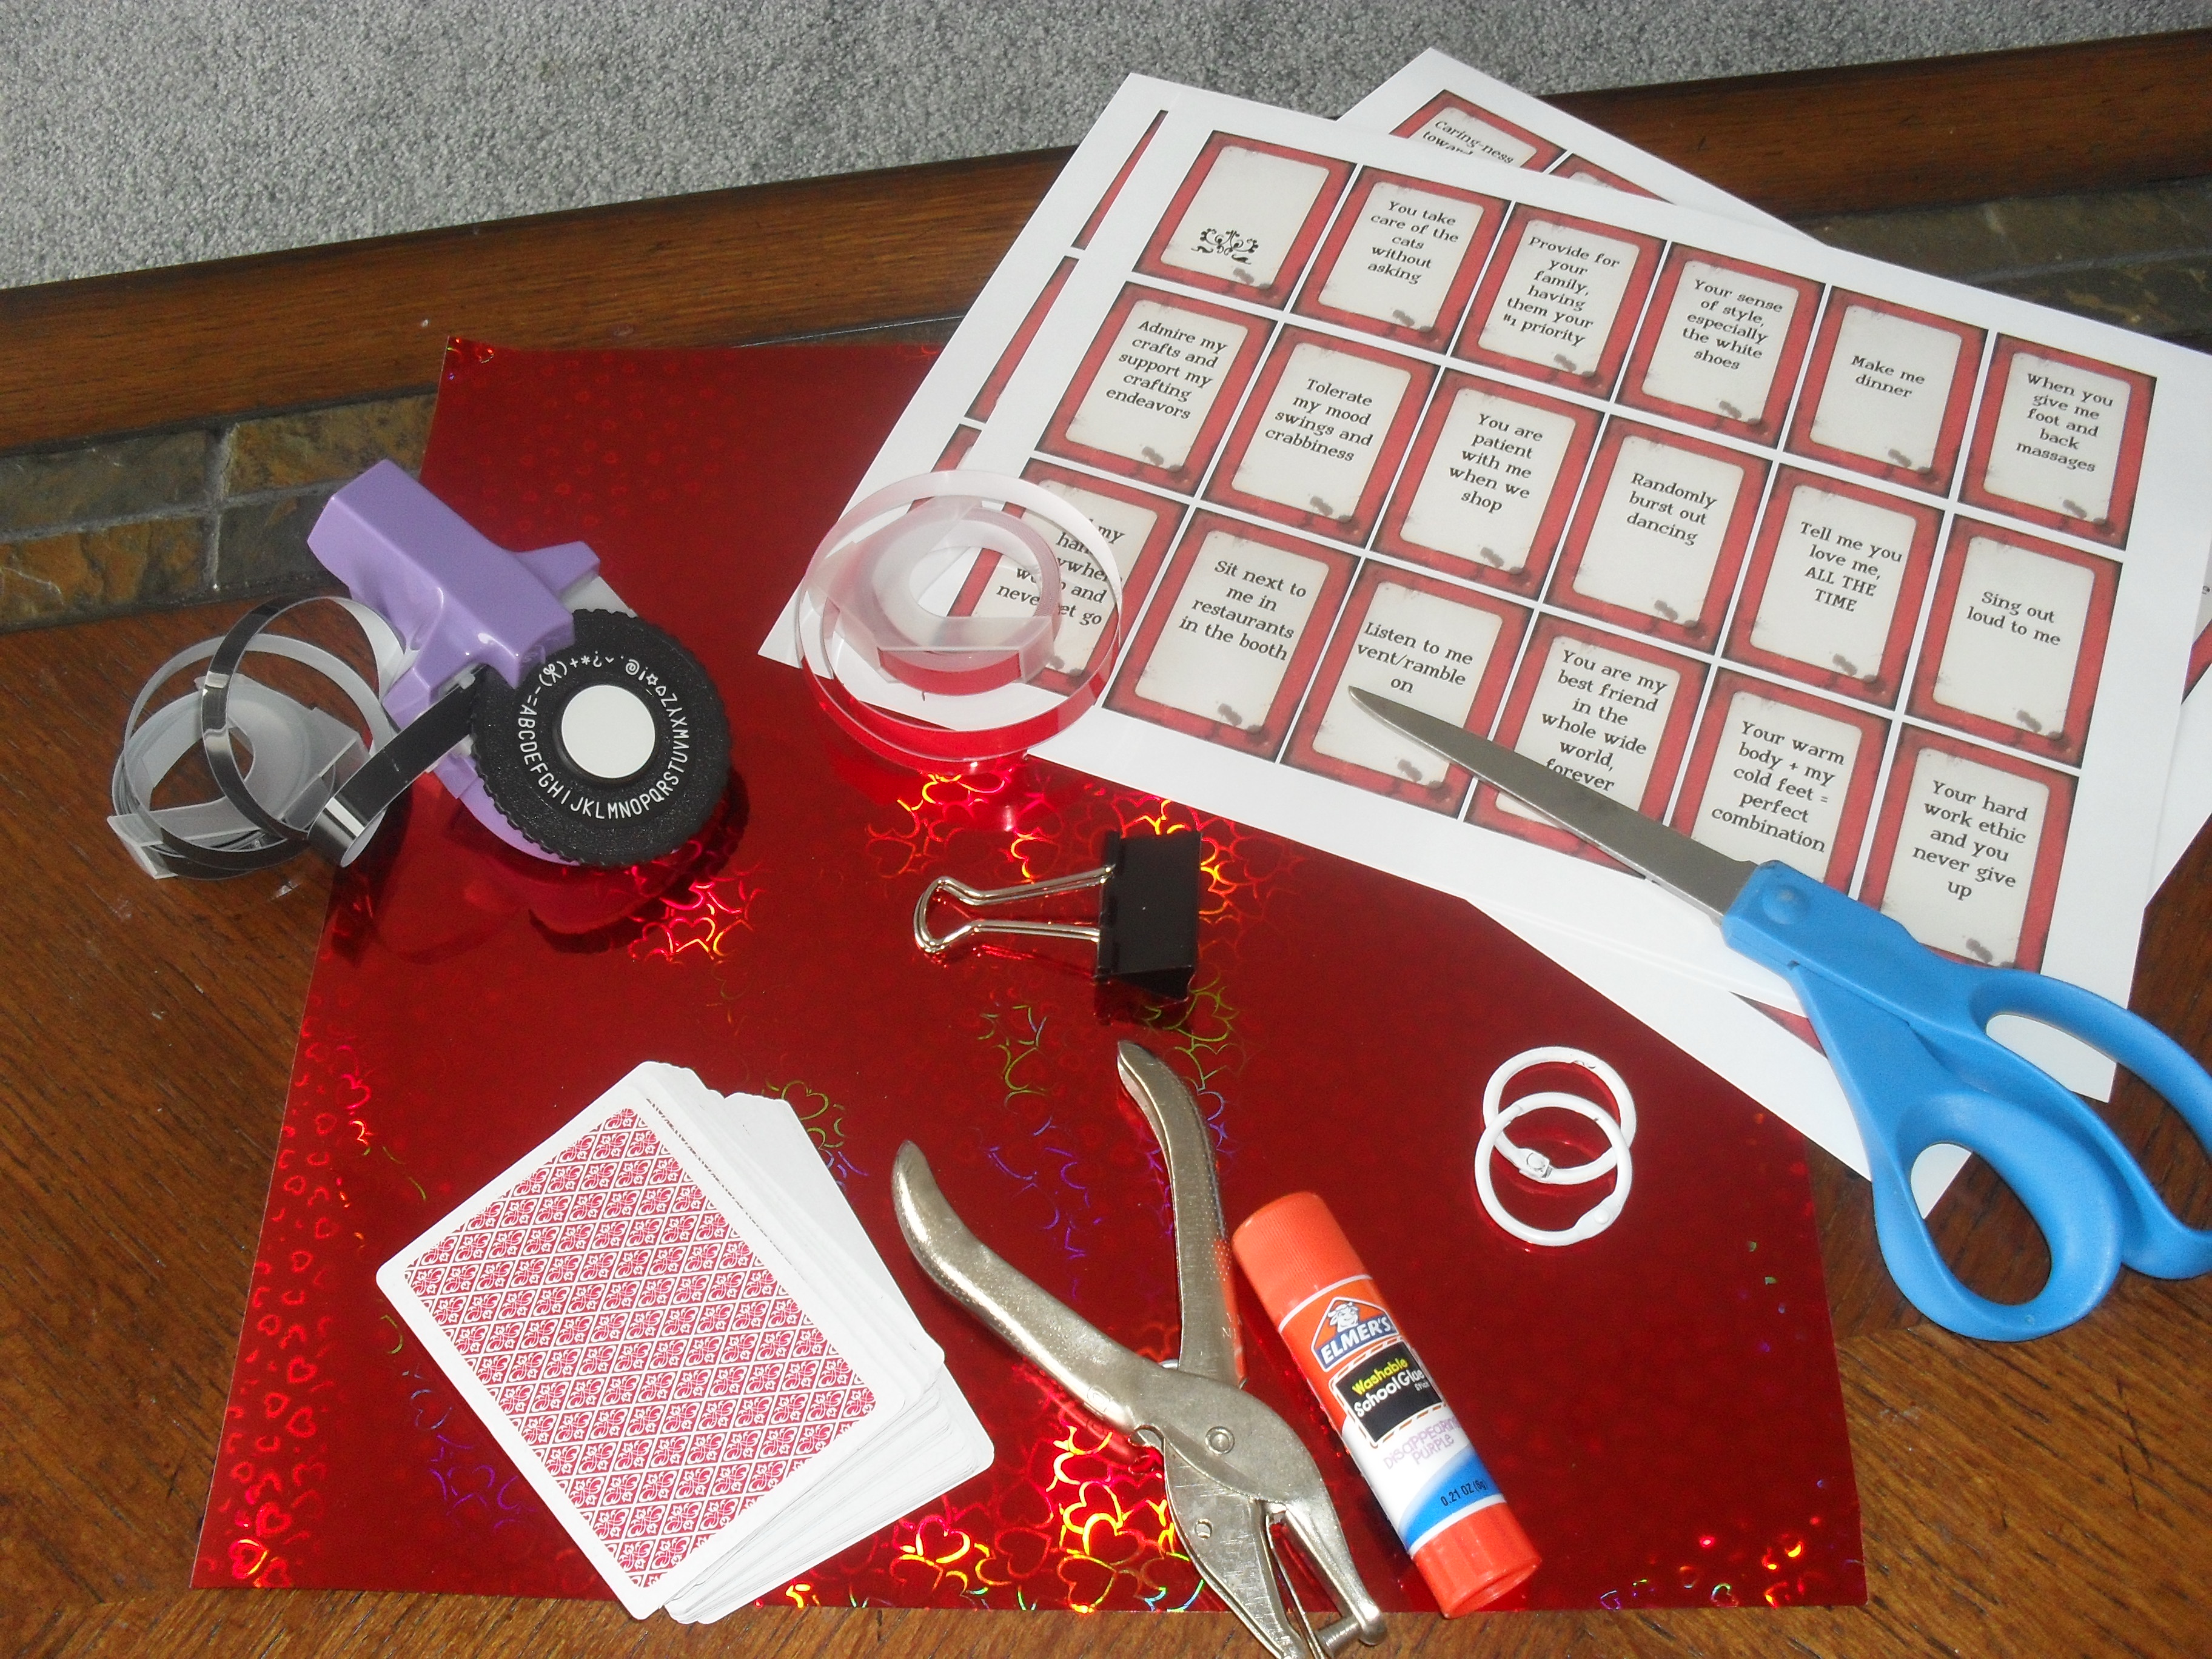
One of the rules for this Valentine’s day was to have both of us make a creative gift for each other. I loved this idea. Me being addicted to do-it-yourself projects, I wanted a gift that would show how much my partner really means to me. I also could not wait to see what he was going to come up with! So I started browsing different ideas and found one that I knew would be perfect. It is a deck of cards where you think of 52 reasons why you love your partner and write them onto the cards. It seemed cheap and easy enough for me. So I found a template where I could type my reasons and print. The reasons came pretty quick to me once I started thinking of them. I typed them into the template and printed on white card-stock. I then cut them out and set aside.
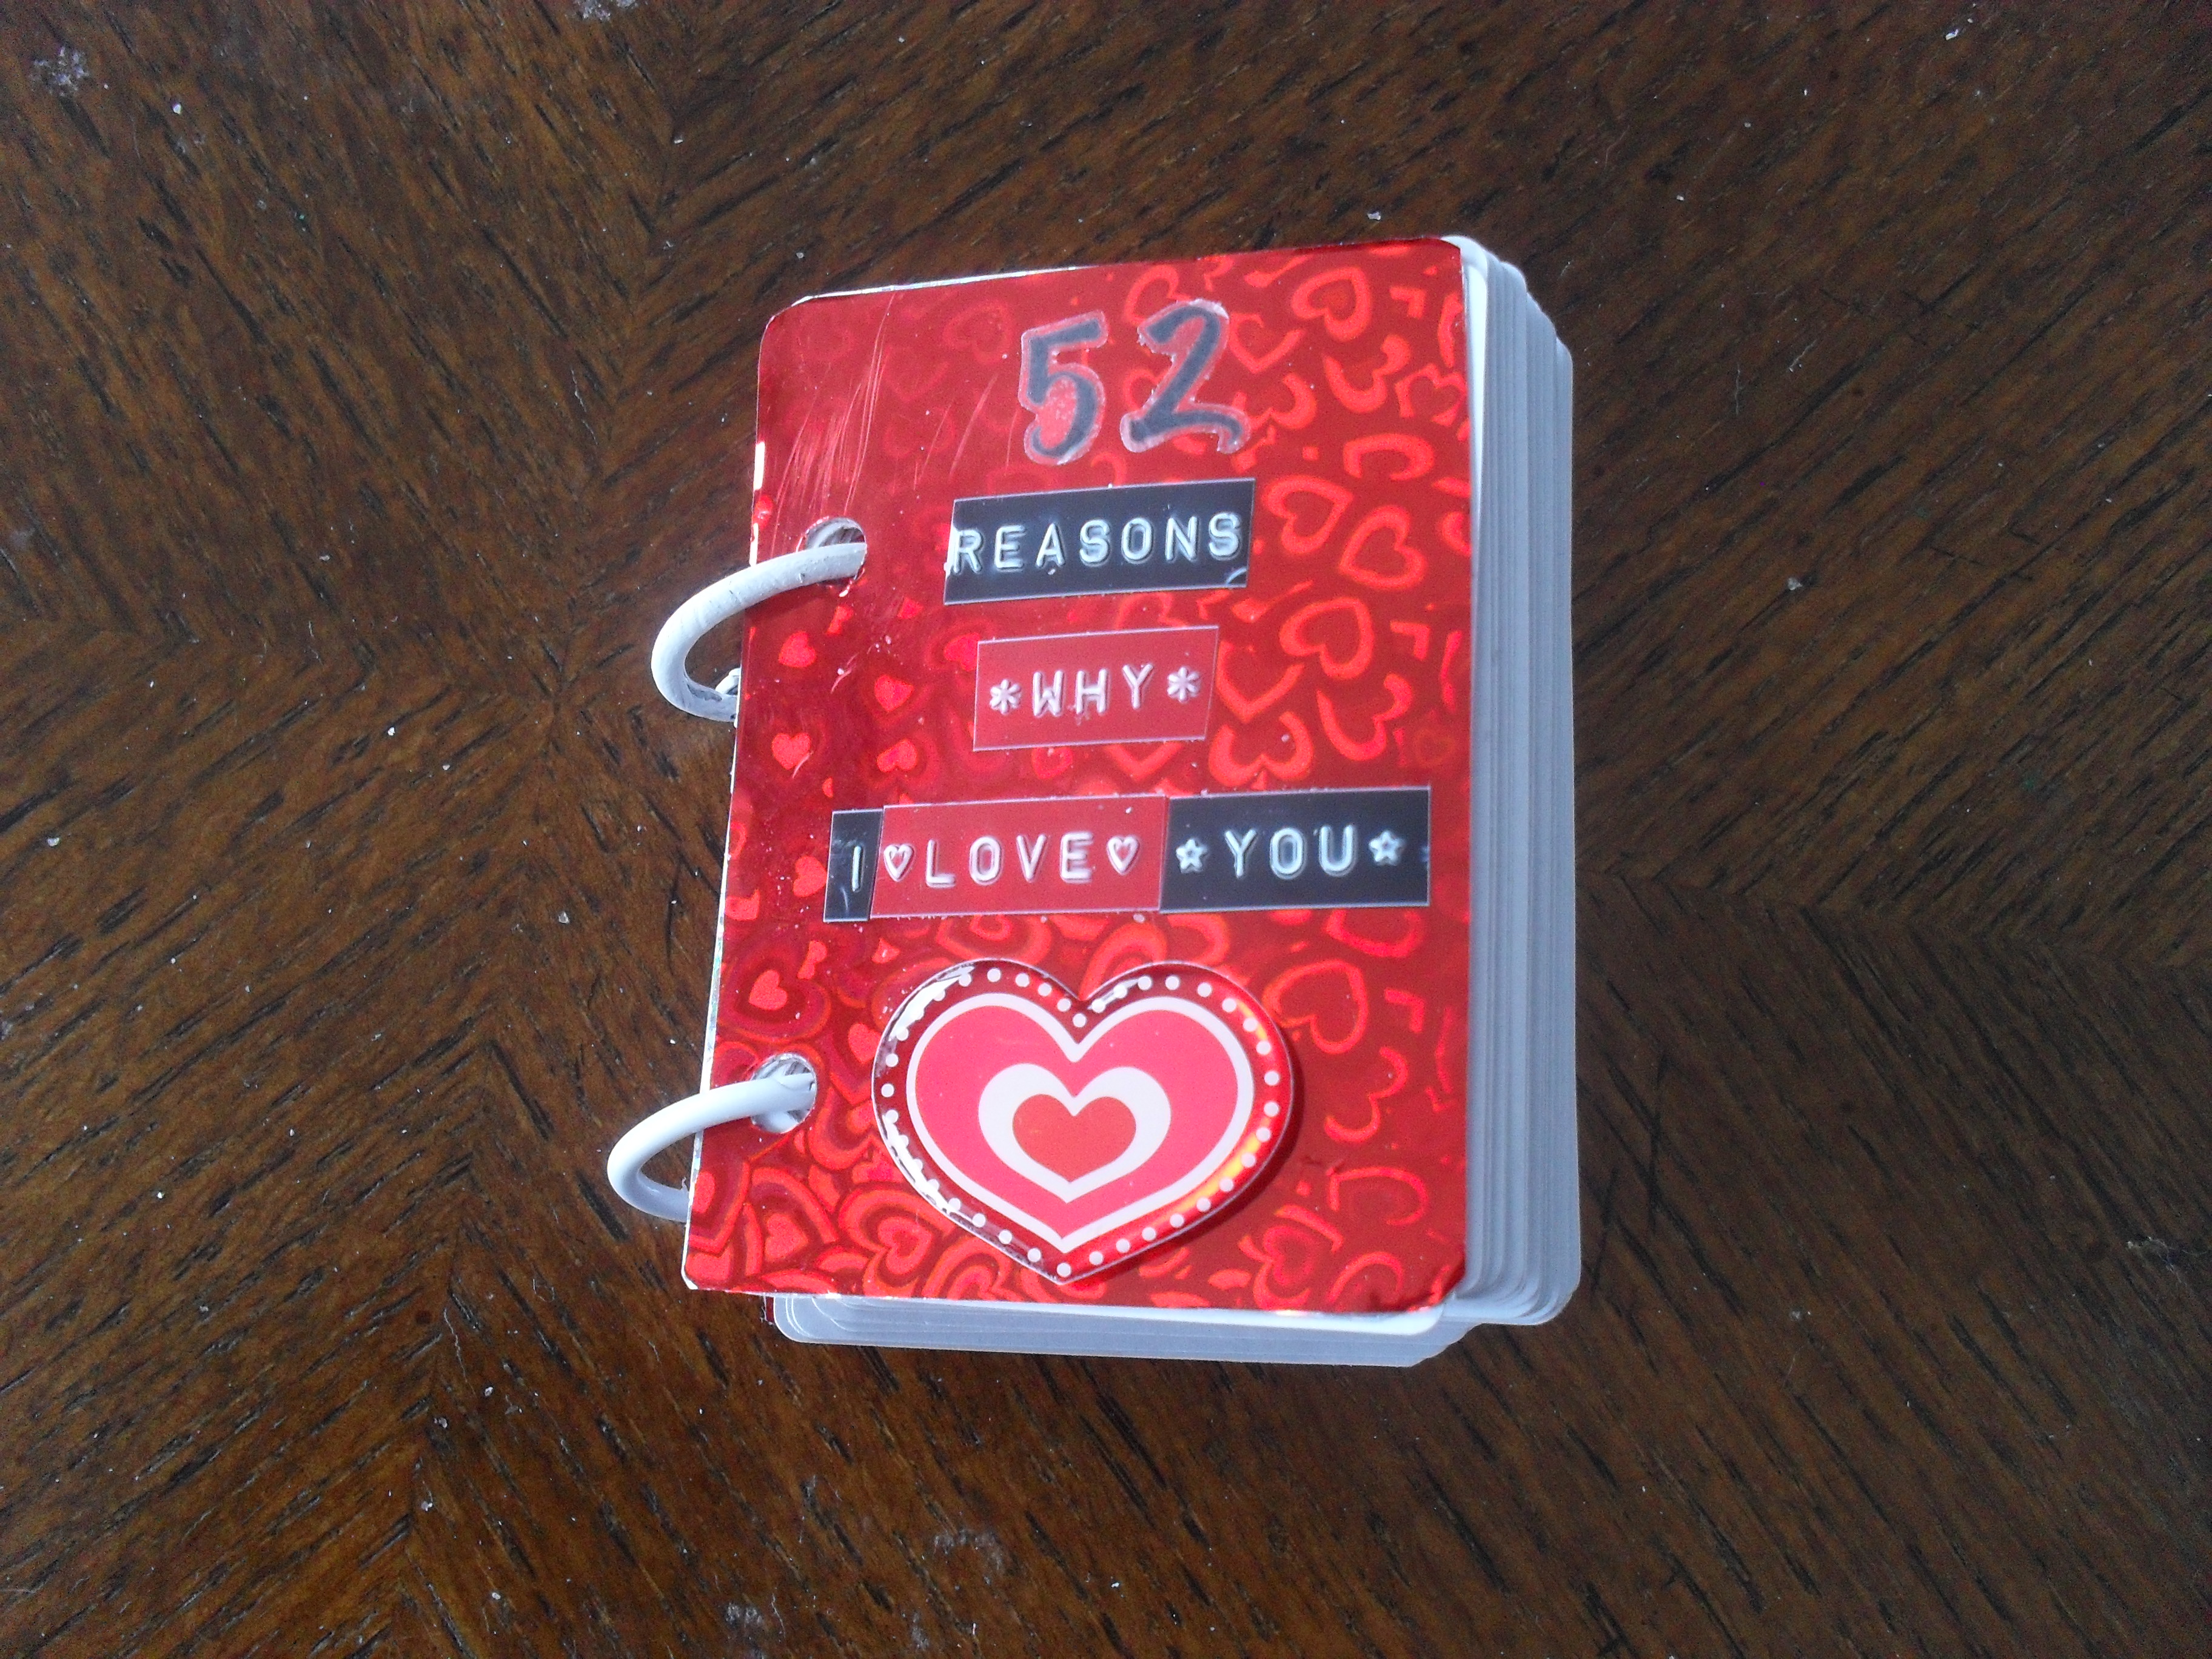
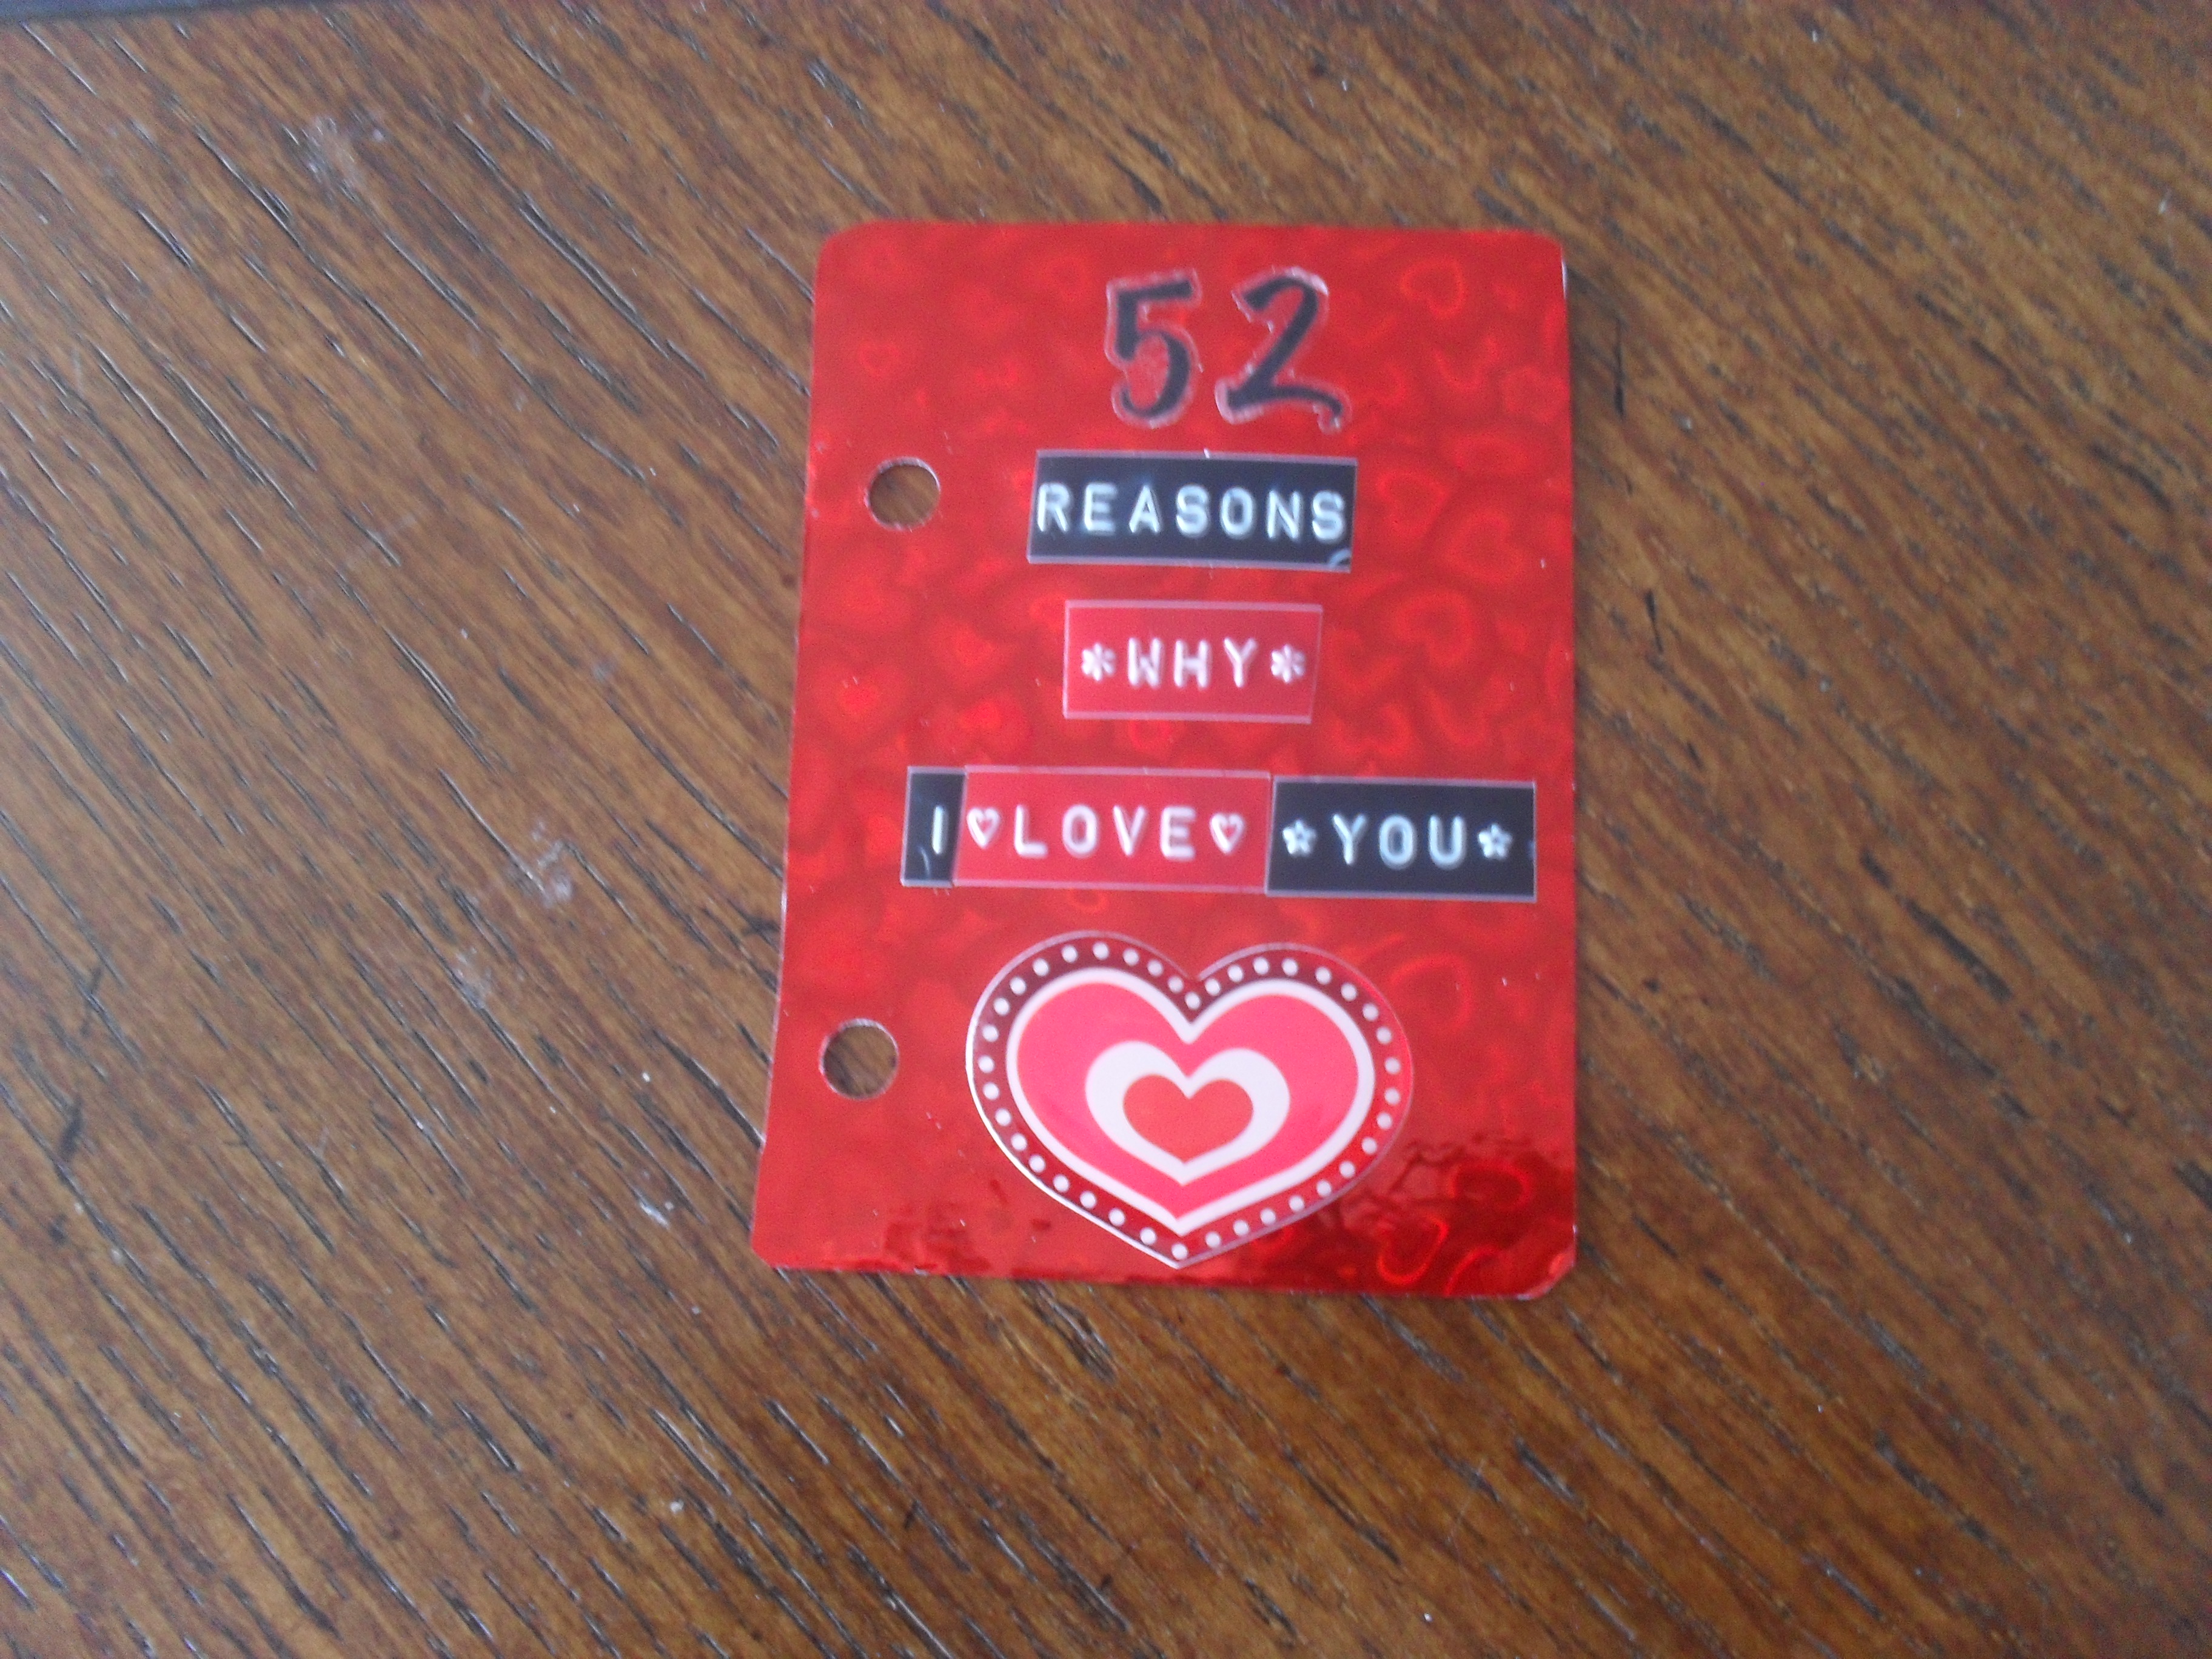
I randomly found this foil sticker sheet that had hearts on it at Hobby Lobby. All I had to do was peel it off and stick it onto the card which I thought would be the perfect background to my cover and end card. I also have a scrap-book label maker which I used for the cover card. I typed out “Reasons Why I Love You” and used stickers for the number “52.” I then placed them all onto the card and had my cover!
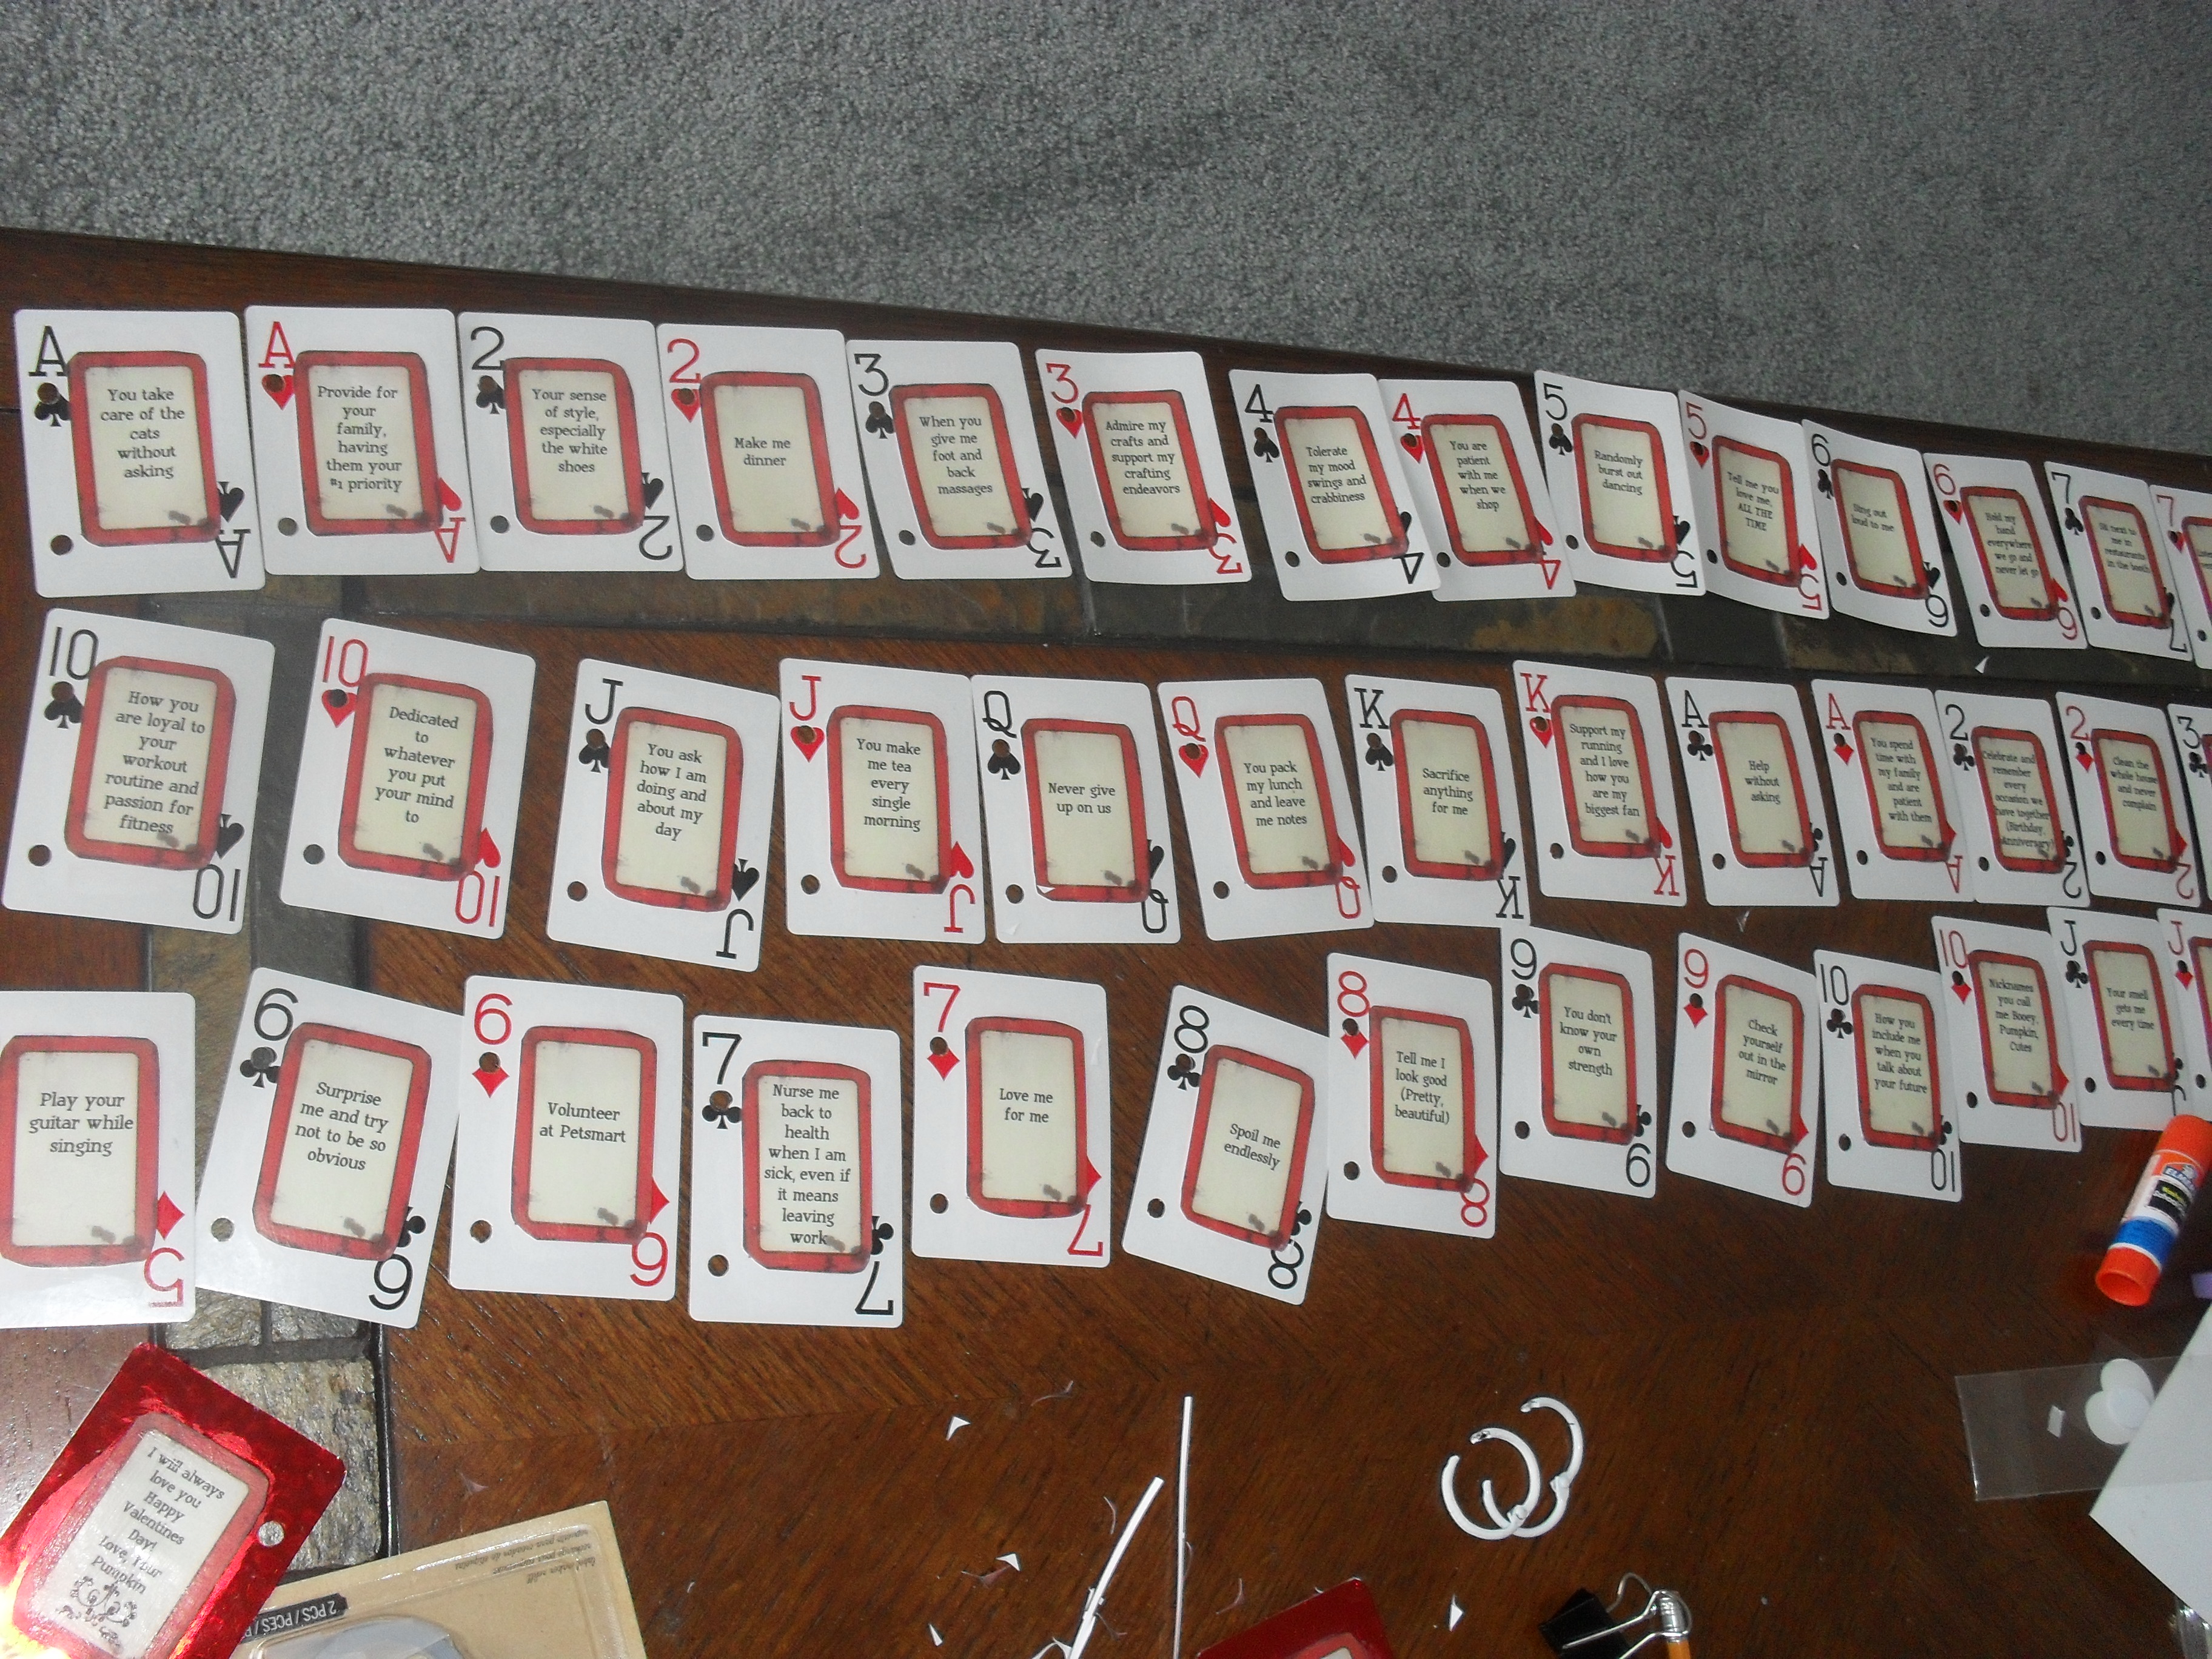
I took the first card and punched two holes. I used that card as a template for where to place the rest of my holes. To do this, I used a binder clip to hold the cards in place (about 4 at a time) and placed the card with the holes in it already on top. I then arranged the cards to my taste. I placed them in numerical order and alternated the black and red. You want to have all the cards facing up because the front cover will cover the front card completely.
After the cards all had holes, I mod-podged the card-stock reasons onto each card. I let dry and then threaded the binder ring through the holes. I found mine at Target and used 1″ rings.
I was then done! I was very surprised with how well it turned out. What made it even better was the reaction my boyfriend had. He could not believe I made it and was so thankful. He brought it to his office at work so he can look at it whenever he wants during the day. This is such a special and meaningful gift. It was fun to make and it is such a great keepsake to have forever! Maha Amircani, an attorney Amircani Law even came up with an interesting twist to this for her business, customizing it for clients and showing 52 reasons they should hire her.
My supplies
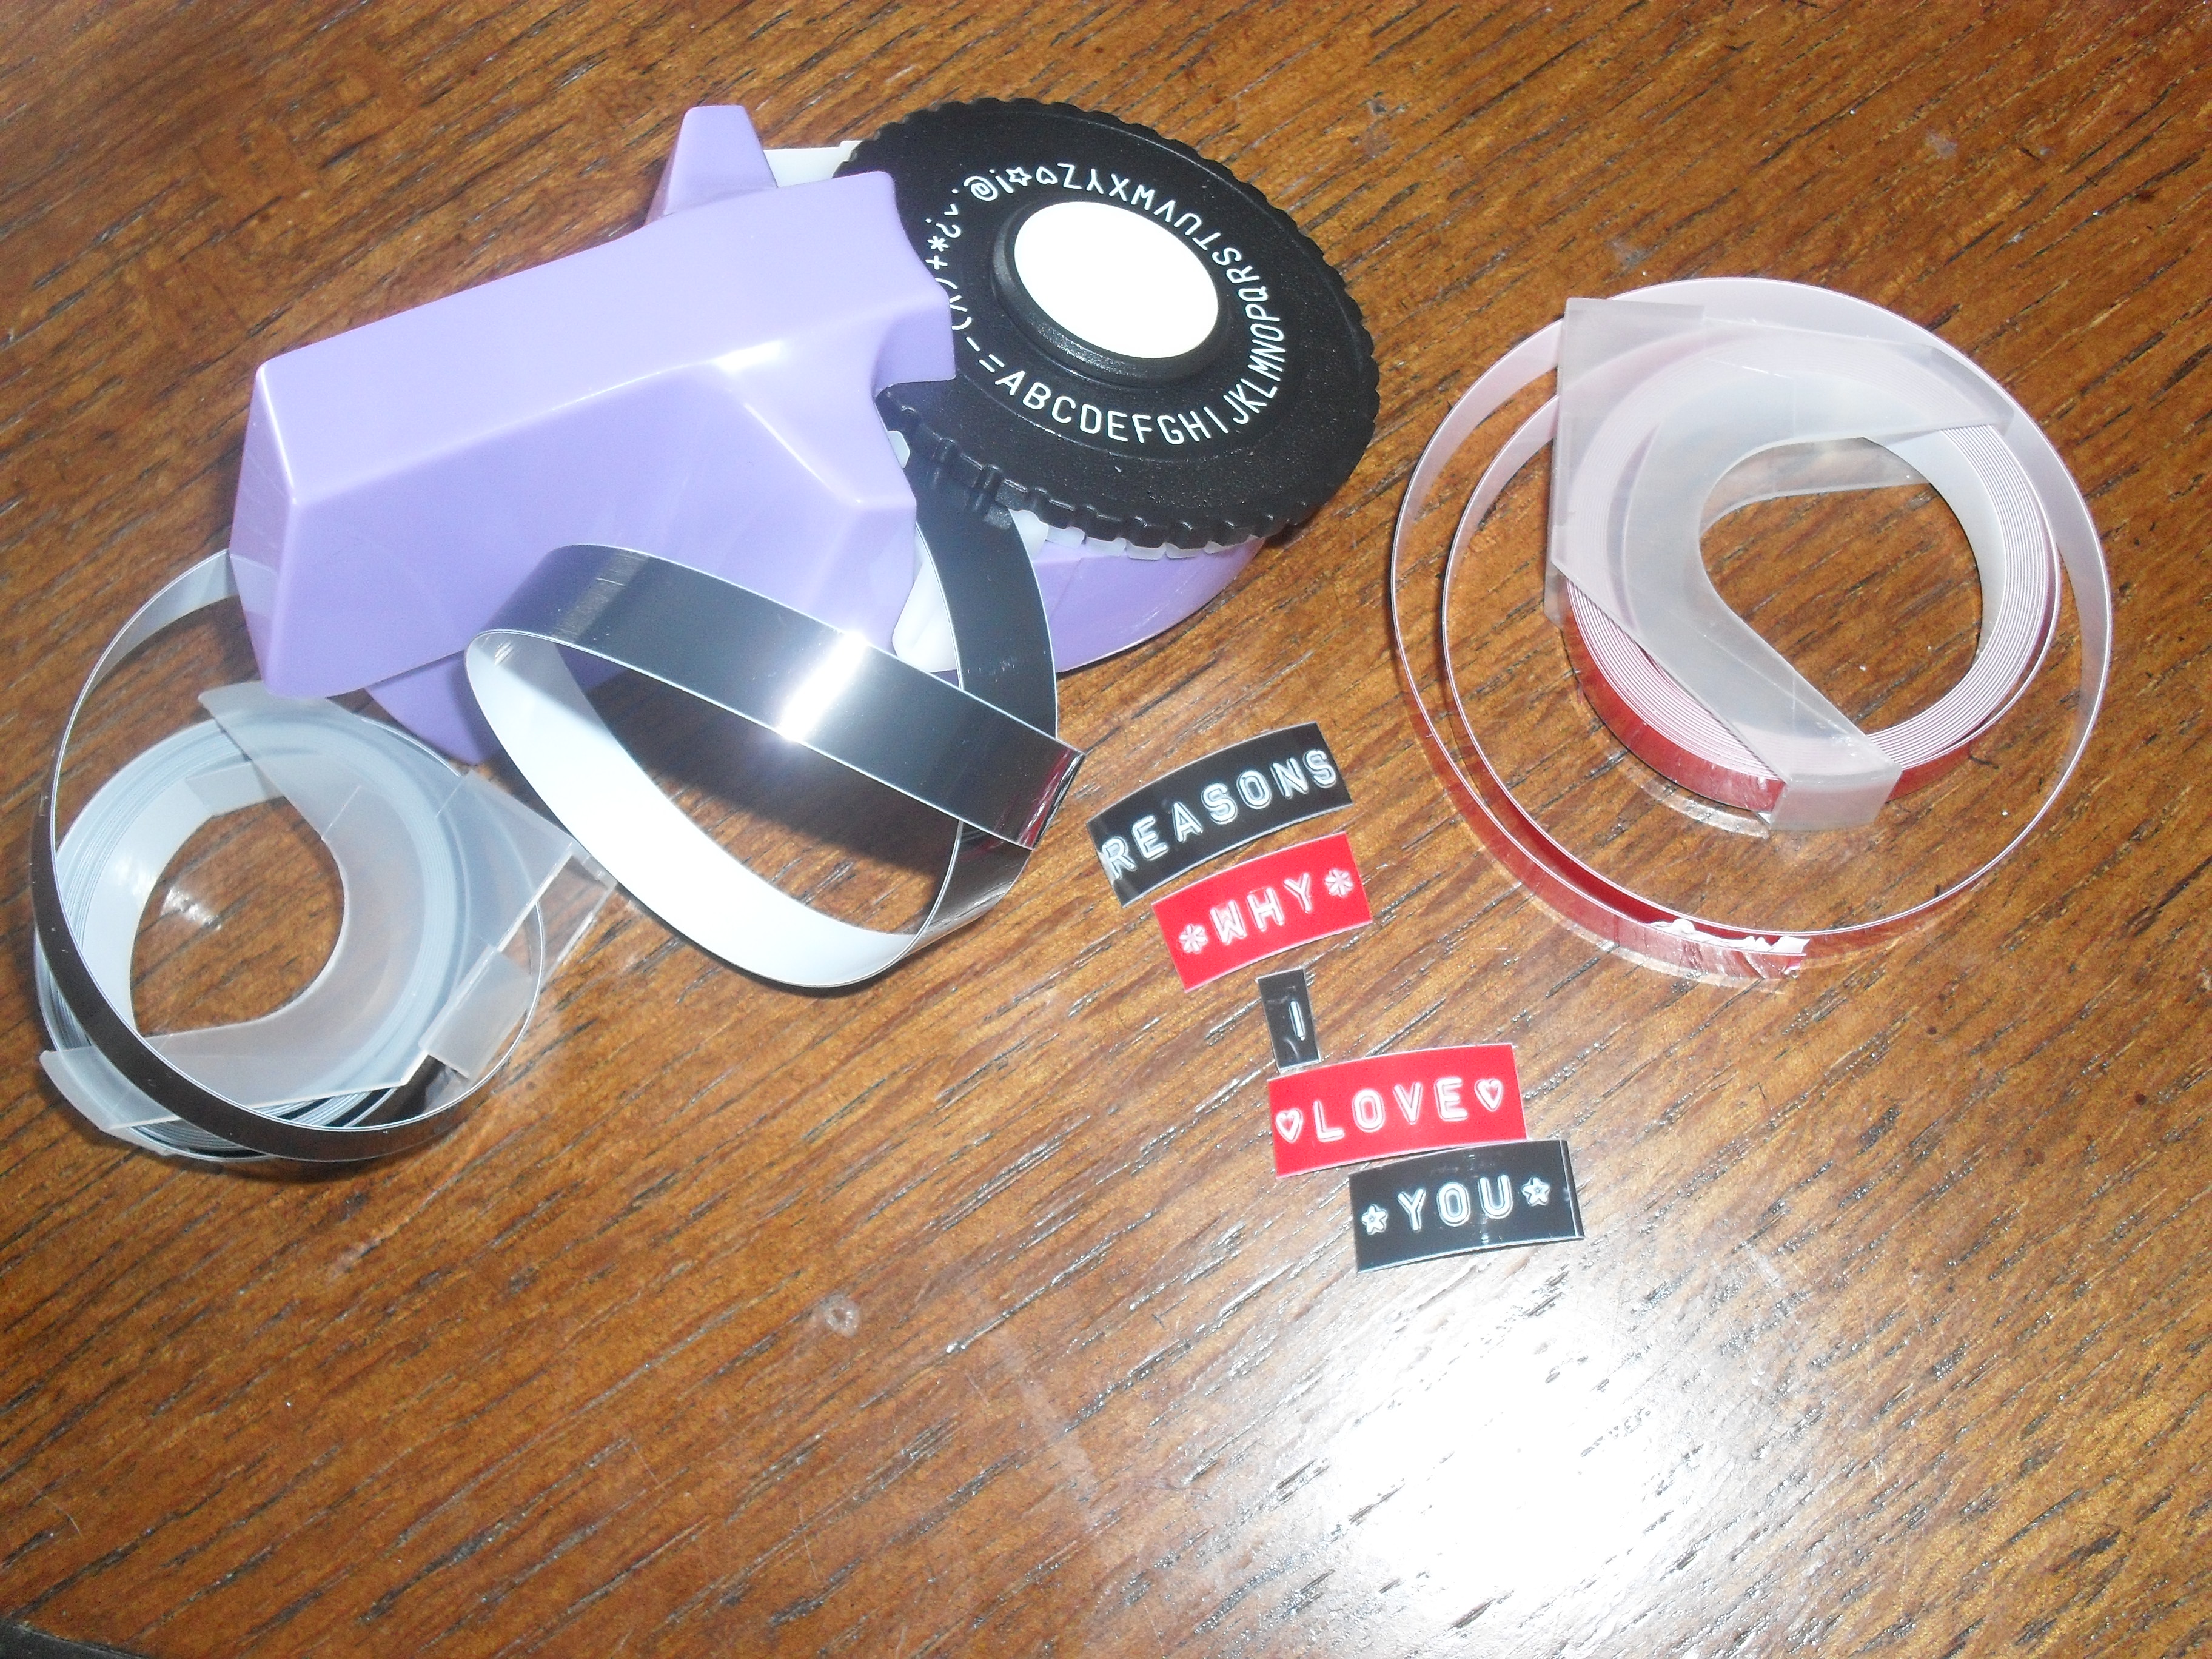
My scrapbook label maker where I typed out the words, “Reasons Why I Love You”

The deck of cards where I alternated the black and red colors and put them in numeric order. I used the joker cards for the front and back cover
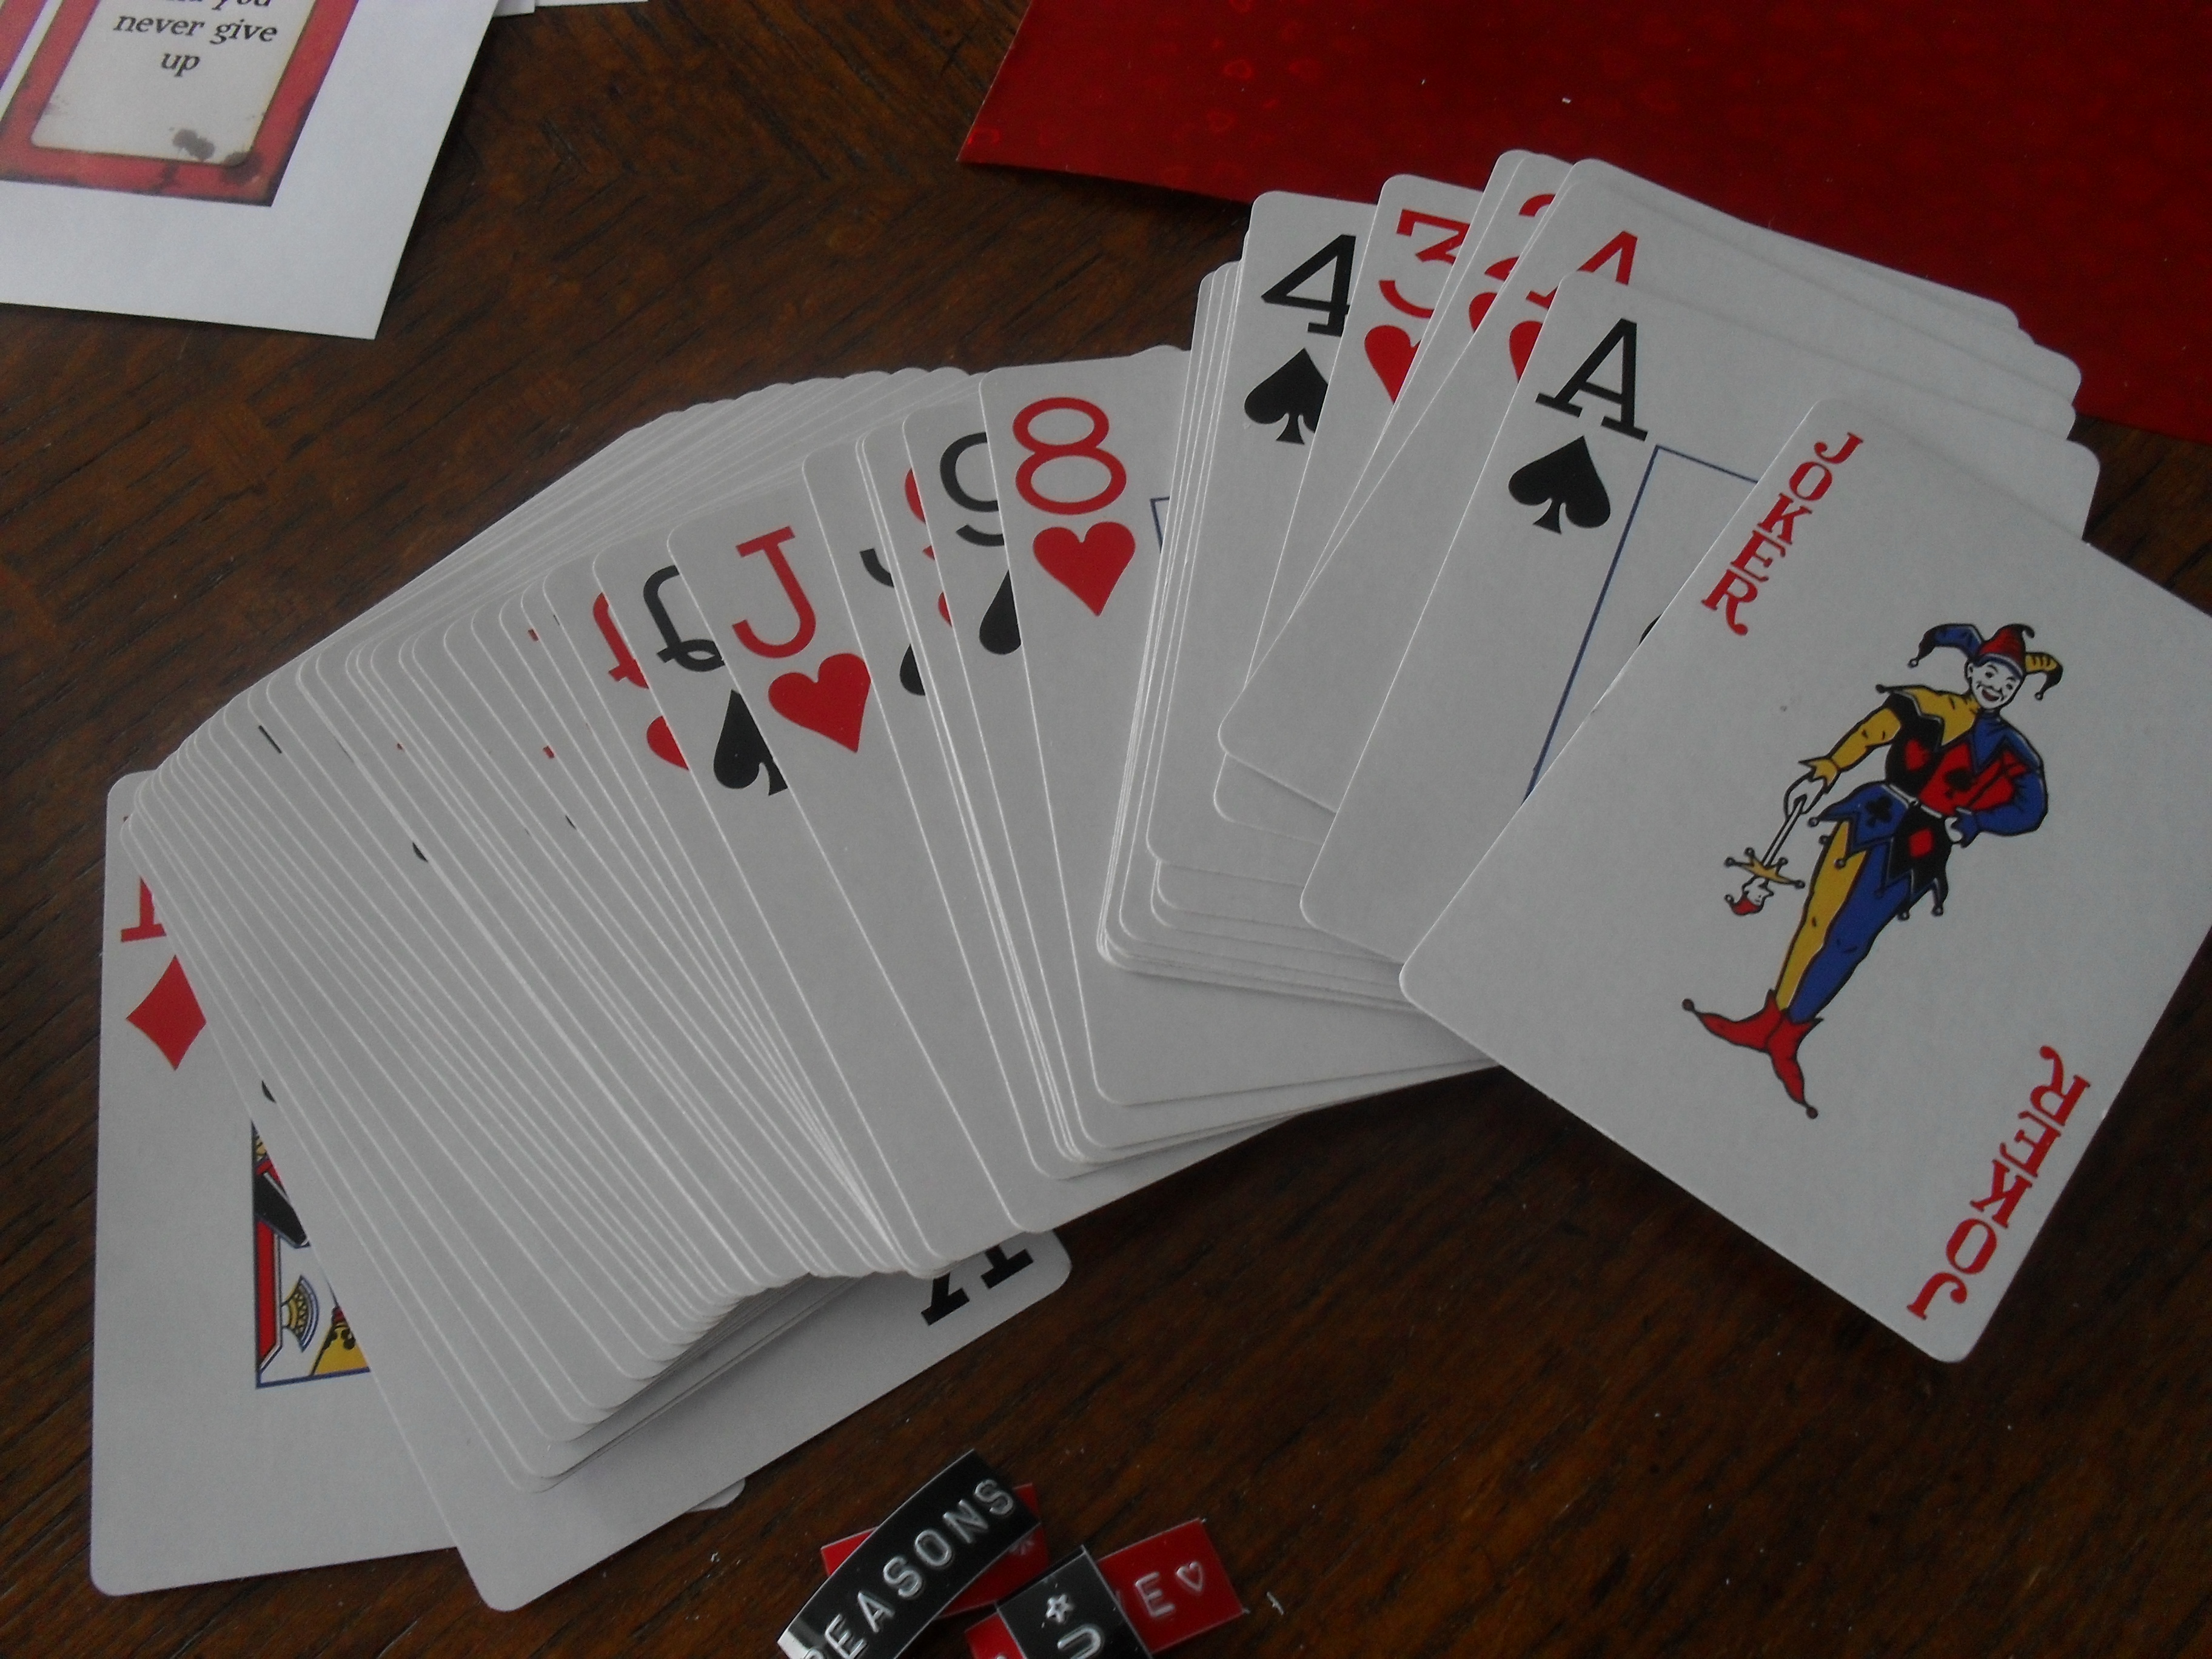
I spread them out so I had a visual and would not mess up my progress

Using the sticker foil sheet, I traced my cover and back card and cut it out. I then stuck it right to the Joker cards and had my front and back cover.

I then took the first card I was using and paper whole punched 2 holes. I took my binder clip and attached as many cards as I could (about 4) and punched the remaining cards. This helped so they would have the holes in the same area.
I then finished with paper whole punching my cover card and stuck on my stickers. This is the front!

I then used Mod-Podge to glue on my reasons to each individual card.
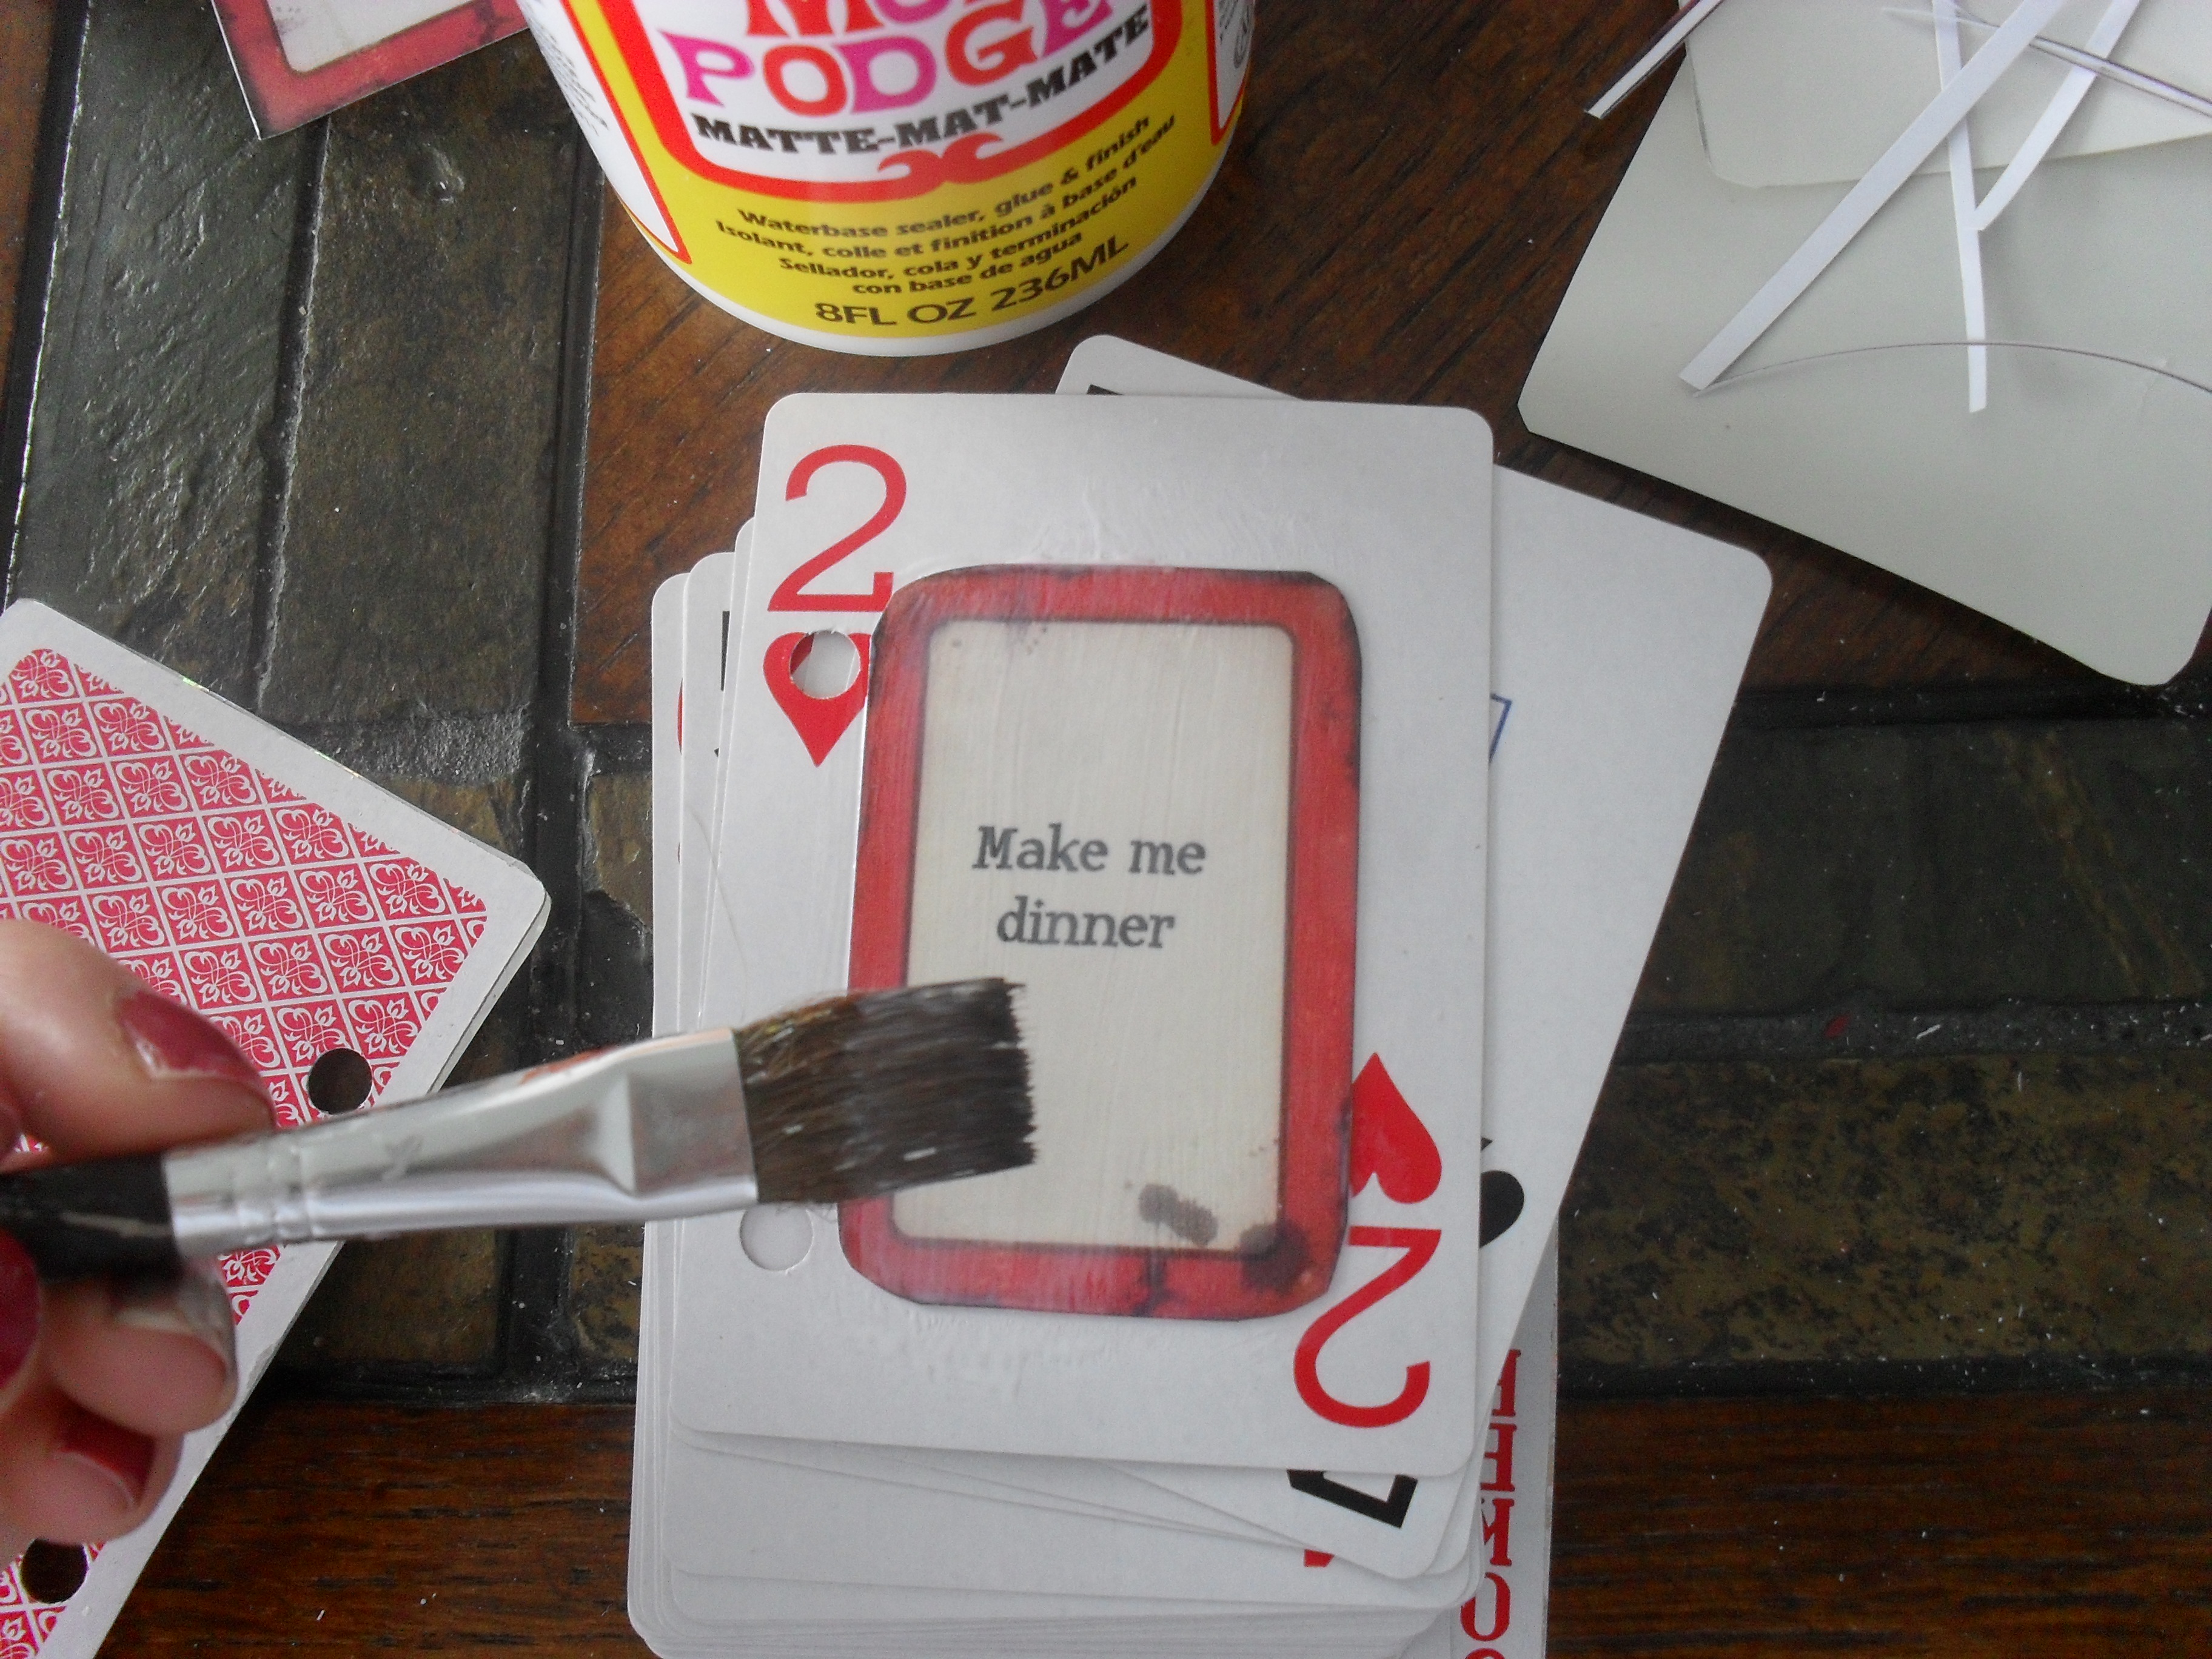
I made sure to cover the back and front completely
I then spread them out to dry
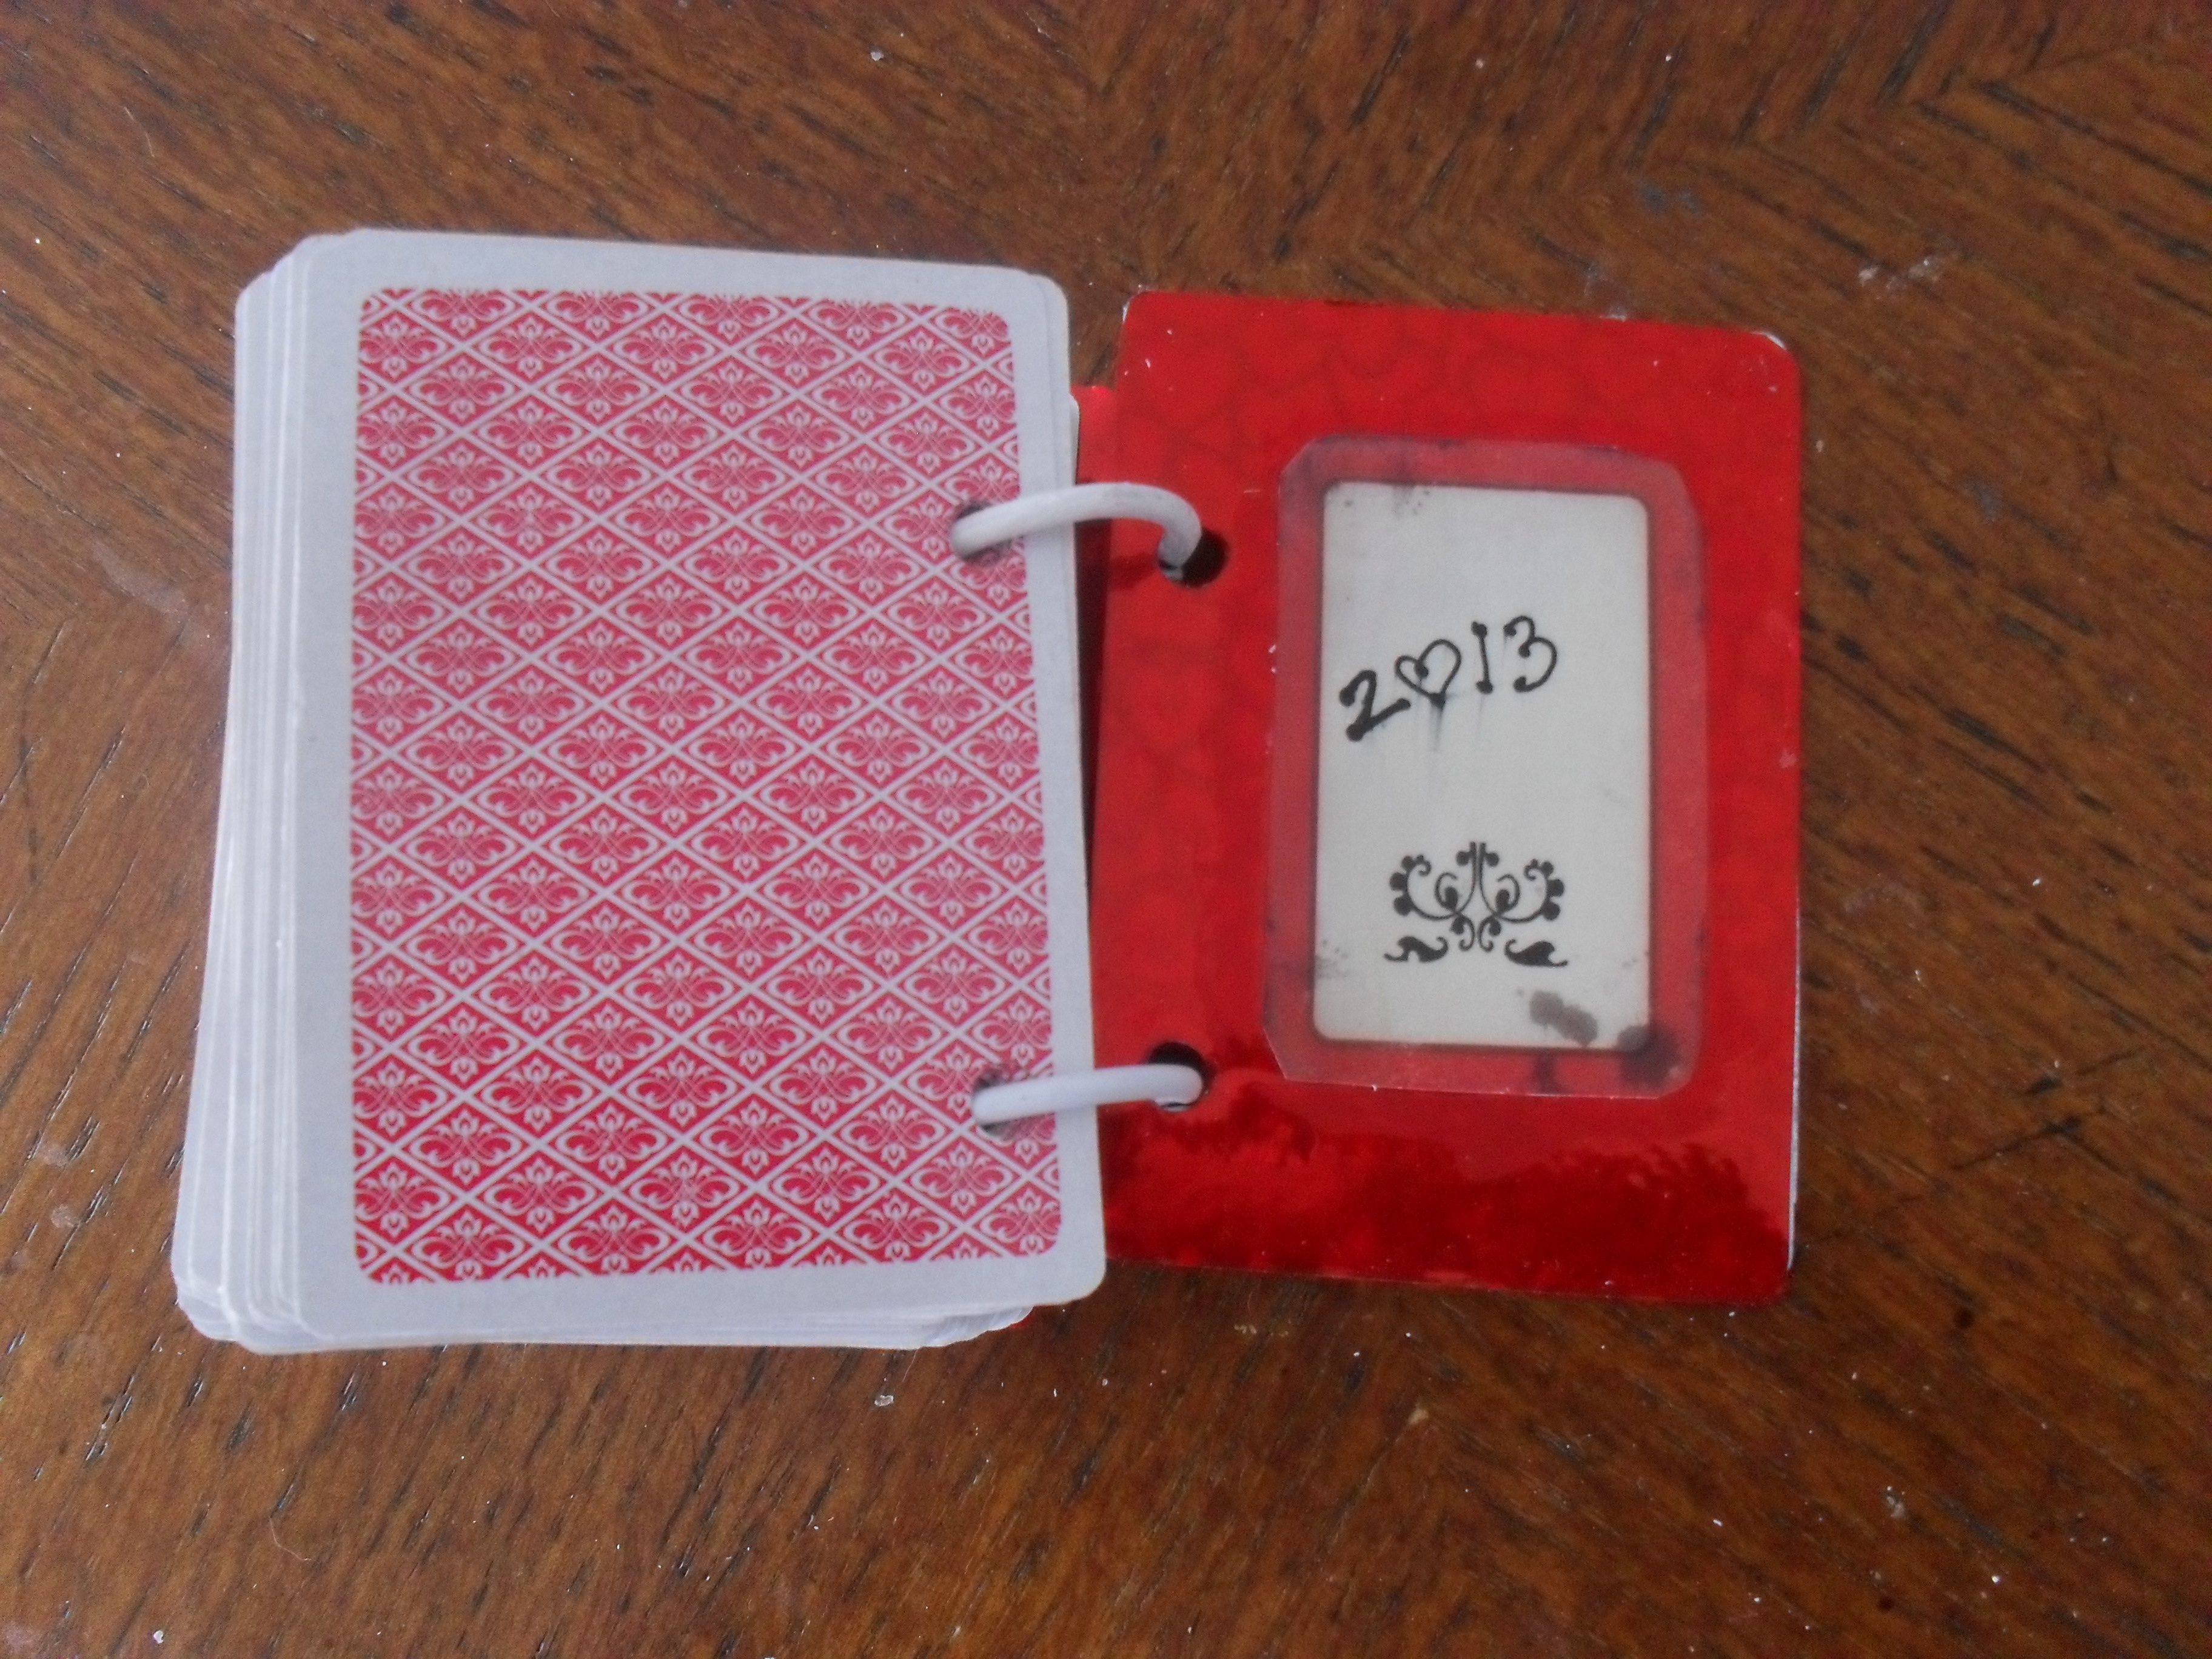
I then fastened the card with my binder clips. This is the back card. I wanted to incorporate the year so I would remember when I made this!
This is what my cards looked like, front and back
My completed “52 Reasons Why I Love You” deck of cards!
You Will Need:
- 1 deck of cards (Found mine at The Dollar Tree…2 came in a pack for $1)
- Hole punch
- Binder clip
- 1″ metal binder rings..you will need 2
- Stickers, ribbon, etc. (Any kind of supplies you want to use to decorate your cover card)
- Glue (mod-podge, tape runner)
- Printable template (or design your own)
***If you are interested in the template I used, respond with a comment (below); I will be happy to send it to you! ***
How To Make:
- Start with a deck of cards
- Punch two holes in one card and then use that card as a template for where to place the rest of your holes. To do this, use a binder clip to hold the cards in place a bunch at a time (depending how many cards your punch will go through) and place the card with the holes in it already on top.
- Use a crop-o-dile or hole punch to punch holes in all the cards a bunch at a time.
- Arrange the cards to your taste. You can place them in numerical order or just at random. You want to have all the cards facing up because the front cover will cover the front card completely.
- Thread the binder ring (or ribbon) through the holes.
- Then cut out all the inserts and start adhering them to the cards with Mod-Podge (glue, or tape runner)
- Decorate the front (and back) cover if you choose with your stickers, etc.
- Alternative: You can tie some ribbons through the holes if you like instead of using the binder rings


