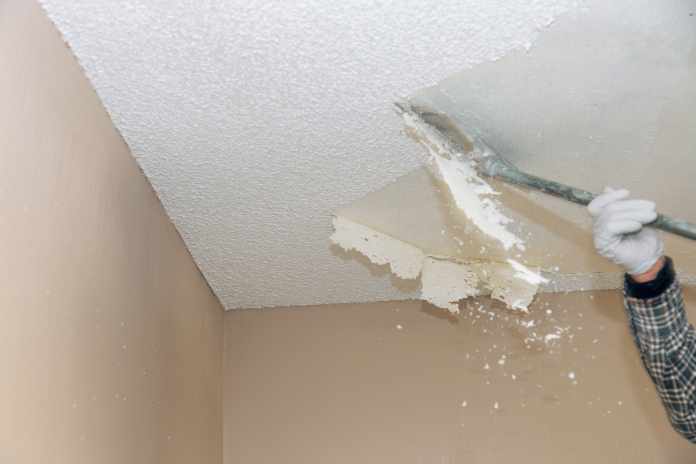
As the 2020s begin to unravel, some retro styles are either coming back or fading into the background, and this trend is noticeable in sectors such as the fashion industry and home design domain. When it comes to home décor, older establishments are now getting rid of old designs they sported once, including the famous popcorn ceilings.
During the 1970s, having popcorn ceilings was a trendy choice, even though this system of finishing already existed a few decades earlier.This system was able to hide imperfections as some believed it to be a remedy for stiflingnoise levels in the house. But as homes eventually became more streamlined in how they’re built, popcorn ceilings became less common an option.
Removing Popcorn Ceilings Like A Pro OrBy A Pro
Fortunately, removing popcorn from your ceiling can be done quite easily these days. All you need are a few tools and some of your time. If you’re uncomfortable removing the popcorn yourself, there are likely several professionals who can help with this project. If you live in Canada, for example, it can be as easy as jumping on your computer and typing in ‘Handyman Mississauga‘ orif you live in another area, it can be ‘Handyman’ followed by the city where you live.
However, if you’re looking to complete this project to save yourself some money, then there are several steps you may want to follow. Here are the most crucial ones:
- Cover Your Furniture And Appliances
You can always vacuum your floors after you’re finished, or you can lay plastic down on the floor. But just to be on the safer side of things, make sure you coveras much as you can. Removing popcorn can be very messy and dusty. Plus, if the dust is bad, you wouldn’t want to have to go back and vacuum your furniture after you spent all that time removing the popcorn.Cheap rolls of plastic can be used for this purpose.
- Acquire The Necessary Tools
Keep in mind that popcorn ceilings applied before the 1970s might contain harmful substances and elements suchas lead and also asbestos. You may want to get this tested by a professional before you begin the project. If tested negative, then you’re free to proceed. But if it comes back positive, you may need to hire a professionalto do it for you.
Make sure you have all the tools at hand before beginning, as it would be harder to stop midway sometimes for a quick run at the hardware store. Aside from preparing plastic coverings, you’ll need a reliablefour-inch utility knife for scraping. An alternativeisa drywall knife. Both have a wide enough base on the blade that they can take more away as you scrape over the material.
To avoid inhaling particles and anything that may be harmful, it’s advisable to wear a protective mask for your face. A separate set of clear goggles and dust mask would also do.
- Take Your Time
Before you begin, it may be worth watching how-to videos onremoving the popcorn, such as this one:
That way, you’ll know what to expect and how to achieve the best results possible.Some videos may show you different methods or morehigh-tech tools, so it may be worth researching to see if you could also access such special tools to rent.
Once you’re ready to start, take the blade of your knife and apply enough pressure to get under the popcorn material. Move the blade as best you can to begin scraping off the material. There’s no promise the popcorn will come off in big chunks, so you may find yourself going over the same spots multiple times to remove everything.
- Cover The Imperfections
Once you have removed the popcorn, you may find a number of imperfections you didn’t notice before. Those might be the reason why the popcorn was applied there to begin with, so don’t worry. Covering these spots can be easy.Prepare some joint compound, sandpaper, and a putty knife to complete this project.
Once you have covered these areas with the joint compound, let it set, then sand it down. From there, you can gauge if it needs further repair or not. If you’re getting your home ready for the market, covering these imperfections can be quite vital a plan.
Conclusion
Regardless of why you’re conducting this home project, know that it can be time-consuming, so you’ll want to ensure you invest that time wellto achieve the best possible results. Mistakes may happen from time to time. But as long as you’re prepared and you have an idea of what to do, it would be a success.


