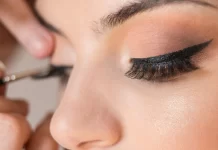
Looking for a bold look for your party tonight? Want to know how to pull off the classic red eyeshadow look? Well, here we have the perfect guide to help you get through this. If you’ve been checking out some of the best red eyeshadow looks online or in the magazines, it might be time when you’d want to try it yourself.
Table of Contents
Guide to apply red eyeshadow
Check out the complete guide to apply red eyeshadow and shine out among everyone at the party:
1. Get all your makeup tools together
To create the ultimate red eyeshadow look, you need the right kind of makeup and application tool. Here’s a checklist of all that you need:
- Eyeshadows with colors peachy pink, pale nude, light brown, plain white, and dark red
- You also need a champagne color highlighter – if not, an eyeliner will do
- Of course, you need a black eyeliner to highlight your red eyeshadow look
- Add a burgundy liner along with the black
- Add a highlighter or a liner brush
- A big and fluffy eye makeup brush
- Crease brush
- Mascara
- Magnetic eyelashes (optional)
Once you get hold of all of these makeup essentials, you are all set to start off with an amazing red eyeshadow look.
2. Create the base
You need to create the base first and we recommend using Blanc Type from Mac. You can also use a similar nude shade if you don’t have this one. You’d need this for the nude eyeshadow to start with.
You need to apply the eyeshadow on your entire eyelids – right from the brow line to the lashes. It serves at the base for the red color and will make sure that the color is well-distributed.
3. Add highlights
You need to use the highlighting brush to add some Mylar from Mac or a white eyeshadow to cover the areas below the eyebrows and brow bone. It covers the inner corners of the eyes. You don’t have to apply any other color for these places of your eye-zone.
4. The first coat of color
Something like Peaches and Cream from the Manny MUA palette, will serve just right for your eyelids now. You can also use a similar peachy pink tone. You need to apply this coat in order to bring a transition to the red tone. Apply the eyeshadow on the lower and upper lids with a big makeup brush. Make sure the color is close to the lash line when you apply it.
5. Time to deepen the shade
You got to apply Frappe-like brown color right till the end of your crease brush. Use the brush to add one more layer of color to the eyelids, but focus on the middle of the eyes or area below it. Make sure you don’t extend the color quickly to go far past the corners of the eyes. You must also maintain a big circular shape around the eyes.
6. Apply the red eyeshadow
You can use the Mars eyeshadow the same source or alternate it with the one you have. Apply the color to the area below the eyelids first and reapply the color tone to your upper lids. When you’re applying the color to the upper lids, make sure you don’t mess up with the area right above the irises. The best way to apply the color is by making an arc or a halo motion.
7. Add a finishing touch
You need to again use the frappe-like color tone in order to make it blend around the edges of your red eyeshadow. It helps soften the transition from the red tone to the color of your body. Not following this step will not bring about the stark contrast between the eyeshadow and skin, and look sickly. You can use a darker tone like the Aphrodite from the palette or a dark brown shade that’s close to this one. Make sure you blend the edges of your red eyeshadow.
8. Use the champagne highlighter now
You need the champagne highlight and liner to apply it on the area over the iris. It should be free of eyeshadow already, but using the liner or highlighter will help you enhance this part even more.
You can also apply the makeup up to the waterline or the inner area of the lower eyelid. Make sure you wipe off the liner tip before you touch it to the waterline. You might also want to wipe the waterline with a cotton swab to make sure it is dry.
9. Apply Artemis
You now need to brighten the area you highlighted with some shimmery white shadow. The Artemis might be perfect for that and it is also a part of the palette. Take the highlighter brush to dab the color on the part right above the irises. You might want to dab some color on the waterline if you want to.
10. Apply some eyeliner
In order to define the eyes a little more, you ought to apply the black color to the upper waterline. Now, use some burgundy on the edges of the lower waterline. If you want to enhance your eye look further, consider trying prescription colored contacts for a unique and personalized touch. Make sure you don’t apply the eyeliner to any other part of the eyelid.
Make sure you dry the waterline before you apply the liner. The best way to blend the two together is by using a waterproof liner for the waterline. These have fewer chances to smear on the waterline than the ones that are non-waterproof.
11. Add some mascara and you’re done
You can’t miss out on the magic a mascara creates of your eyes. You need to apply some on your lower and upper lashes. Make sure to use a black mascara instead of blue or brown. The black ones look the best with your blood red eyeshadow.
You must also curl the upper lashes with an eyelash curler before applying mascara if you want. Curling the lashes will give them definition and volume. To have an added lash volume, you can try using magnetic eyelashes on your upper eyelids. Make sure it doesn’t smear the main thing though!


