

Last Updated on August 1, 2017
When you hear somebody say, DIY painting, you probably think of a few boring hours spent painting emulsion onto the walls with a roller. It doesn’t sound too exciting, but there is a whole host of other great DIY projects you can do with paint that you can use to create some brilliant wall decoration for your home without breaking the bank. If your walls are looking a bit bare, don’t bother buying things, make your own using some of these great techniques.
Hydro Dipping
Hydro dipping is an industrial technique for painting lots of different things, you might have seen a video going round of an army helmet being hydro dipped. The method involves floating a layer of paints on top of some water and then dipping whatever you want to paint into it. While it was developed for industrial use, you can do a scaled down version at home with a few cheap items; you will need:
- A blank canvas.
- Spraypaints (get a few different colors, and go for ones that look good together if they mix).
- A bucket (make sure you can fit your canvas into the bucket).
Once you’ve got all of your stuff together, the first step is to fill the bucket with water. Then take your spraypaints and start spraying them onto the water. Give them a shake for a minute or so before you use them and keep a good fifteen centimeters between the nozzle and the water otherwise you’ll make a mess.
Spray three or four colors in equal amounts, they should sit on top of the water. Next, take a piece of scrap wood and stir the paints around. You should do a few larger swirls so the paint makes patterns but be careful not to mix them all together into one color.
Finally, dip the canvas, front first into the paint and lay it on there for a few seconds. When you take it out, it should be covered with a great psychedelic design. Give it a few hours to dry and it should be ready to hang on the wall.
A canvas is just one of the things that you can hydro dip, but the possibilities are endless. As long as you are using a material that the paint will stick to, you can put great designs onto any of your tired possessions.
Airbrush Painting
Airbrush painting is another technique that started life as an industrial tool, but like hydro dipping, people have been coming up with innovative new ways to use it. Before you start any kind of airbrushing project, you’ll need to get the right equipment. You could buy an airbrush gun, or if you are feeling confident, why not try building your own? You’ll need to look for the top portable air compressors as they will be the main component of your airbrush gun.
Image From Public Domain Pictures
Airbrush painting is quite similar to spraypainting, but you can be much more precise and create smaller pieces with it. If you are just getting into airbrushing, you should start off with a single color while you get used to it. Draw a pencil outline of the picture that you want to airbrush and then start filling in the outline. When you’re trying to do a line, most people make the mistake of spraying and then moving their hand. This will result in a large dot at the beginning of the line. Start moving your hand slowly before you turn the paint on, this will be more even.
Managing the air pressure is also key to being precise. The best way to do this is alternate between turning the air on and turning the paint on. Turn the air on until the pressure is right, then switch it off and start painting. Once the pressure is low again, turn the paint off and put the air back on.
If you want hard lines then the best way to do it is to use a stencil. Once your technique improves, you might be able to do solid lines freehand, but as a beginner, you won’t. Use a craft knife to cut a stencil out of some cardboard and place it over the page, this will ensure that you can’t go over your line.
These are just a few tips on the basics but the best way to learn is to experiment with your techniques and see what happens, and don’t worry if you make mistakes along the way. Check out the best EDC fixed blade knife here.
Drip Painting
DIY drip painting is one of the easiest ways that you can create incredible wall art, anybody can do it. You will need:
- A canvas
- An easel (this is just to rest the canvas on while you paint so if you have something else suitable that’s fine).
- Liquid acrylic paints (you can use non-liquid ones and mix them with a bit of water first, the effect will be the same).
- Paintbrush.
- Spray bottle.
The first step is to put the canvas on the easel and use the spray bottle to cover it with water. Use the paintbrush to spread it evenly across the entire canvas. Make sure that you put something down to catch the drips because it will get messy.
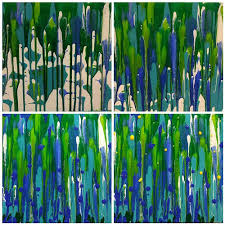
Then spray paint onto the brush and dip it into the paints. Start with the lightest colors first and do some larger strokes, the paint should start to drip down the canvas. Once you have the lighter strokes on the canvas, dip the brush into some of the darker colors and hold it at the top of the canvas. There’s no need to paint any on, just let it drip from the brush and run down the canvas. Let those colors dry and if you feel that it needs it, then add more layers on top.
Splatter Painting
Splatter painting is so easy and it’s great fun to do, especially with children. They’re allowed to get messy and throw paint around so they’ll absolutely love it. You can create a whole picture by splatter painting, or you can add it to an already existing design for great effects. Here’s what you need to get started:
- Canvas
- Paints (Acrylic or oil will work, but makes sure you have something thin enough to splatter).
- Brushes.
- Straws (optional as they are used for a specific technique).
Before you do anything, make sure you lay down plenty of newspapers around your working area and wear some old clothes, you aren’t going to make a good splatter painting without covering yourself in a bit of paint as well.
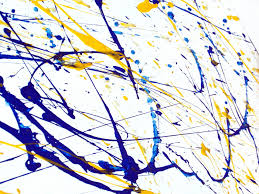
Image From Public Domain Pictures
Now it’s time to get started. Open up some paints and start throwing it at the canvas. There are a few different techniques that you can use. Wrist flicking will create random splatters across the canvas; take a paintbrush, get a good amount of paint on it and give a short, sharp flick of the wrist.
If you want larger areas covered, take a teaspoon (preferably one that you won’t eat with again) and fill it with paint, turn it upside down and catapult the paint onto the page.
To get more precise, focused coverage, you need to use the straw if you have one. Dip one end into the paint and place it on the canvas, then blow through the other end and you should get smaller splatters that won’t spread as far.
Use a combination of these three techniques, and anything else you think could work, to cover the canvas. Don’t go overboard, less is often more with splatter painting.


